Creating a simple navigation bar
Before starting this tutorial, let me assume that you’ve come from the CSS tutorial about Styling Text on my website. So, at the moment, we’ve some basic tools ready in our hands:
- Basic selectors, class selectors, id selectors
- Commonly used properties:
color&background-color - Position properties
- And some properties used for styling text
In this tutorial, we will make use of these tools to create a simple navigation bar. And this is how the navigation bar will look like:
Screen shot:
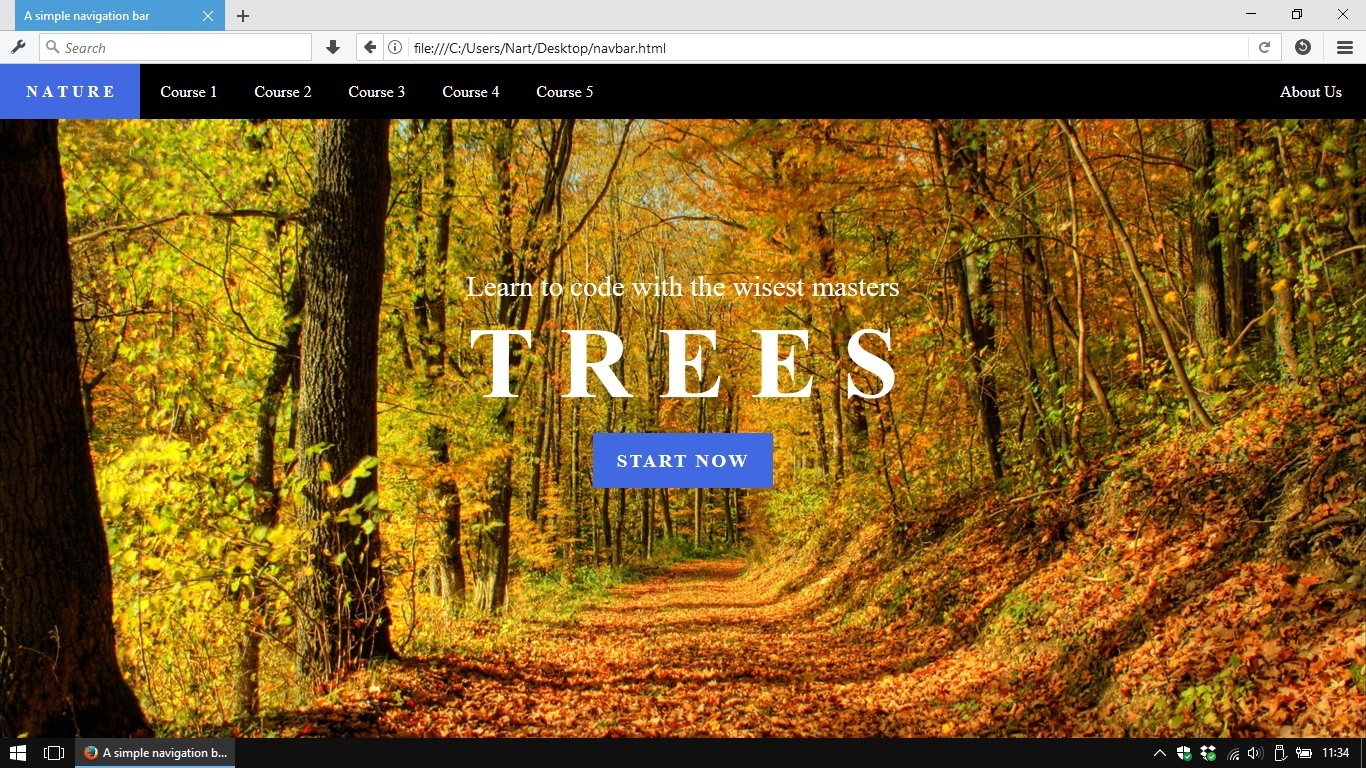
This tutorial is just an example, you should give the navigation bar your own style (size, color, font, etc…)
Preparing HTML code
From the expected result above, the navigation bar will contains 7 links.
2 of those links have unique style and should have their own id:
- The first one which is a logo, has unique
background-color - The last one which is
About Us, stay at a special position (detached from the rest).
The navigation bar itself can have an id if you expect it will be an unique
part of your website.
HTML code:
To-dos in CSS
Styling task can be divided into these sub-tasks;
- Coloring the
<nav>container and make itfixedon top of the viewport. - Sizing up all the links.
- Give the
#logounique style (maybe unique background-color or fancy font :D). - Set position of the
#aboutto the right corner of the navigation bar.
1. Styling the <nav> container
To pin the navigation bar at top of the web browser’s viewport is a simple task
which we have done once in the tutorial about
position-properties.
Just remember to set the container’s width to 100%. Because the rule
position: fixed; will make the container collapse if we don’t specify
container’s width.
CSS code:
2. Setting size of <a> elements
We’ve done this once in the tutorial about container-types.
CSS code:
3. Give #logo unique style
This part is optional and it depends on your own style, you may want to use an image or text as my example.
CSS code:
4. Positioning the #about
This is the last and the easiest task. We will just set its position to the right corner of the navigation bar. :D
Clean up code
Congrazz! :D
You’ve created a simple navigation bar for your website. Just save these code
snippets somewhere in your computer so we can make use of them in future.
HTML code:
CSS code:
Summary
This navigation bar is simple and ready to use but it also has some drawbacks:
- Lack of hover effect. It’s a small feature to make our website more interactive. Visitors who use computers will be more pleasure when they hover mouse pointer on a link and see some effects. Maybe the text color or the link’s background will be slightly changed, etc…
- Links’ widths are fixed. In case our links contain words which have different lengths, the total look will be a bit cluttered. And we still have to change CSS code to adapt to the certain texts.
- The navigation bar itself is not responsive and well adapt to mobile screen. Normally, on mobile screen, the main block of links can be toggled by clicking on a button.
There is no disappointment here. It just means that we can make everything better in future when we have more tools in our hands (advanced selectors, spacing properties, screen size query, etc…).
It’s time to come back to our unfinished CSS tutorials. There’re many interesting stuff waiting for us.
Click here to go back to the CSS tutorial about Styling Text.